Operation Stirling Castle
The Argylls Re-enter Crater
'Ye may talk aboot yer Gordons and yer gallant forty-Twa,
Yer silver-streakit Seaforths and yer Camerons sae Braw,
But gi's me the Tartan O' the lads who look sae fine,
The Argyll and Sutherland Highlanders-"The Thin Red Line",

After the murder of British troops by the Arab Armed Police (See The Arab Police Mutiny), all British forces were withdrawn from Crater. Royal Marines of 45 Commando took up sniping positions on the high ground surrounding Crater. Over the next ten days the Marine snipers identified and "took out" 10 ten armed Arab terrorists in Crater. There was estimated to be 400-armed Arabs in the now lawless Crater. The bodies of the slain British troops were given a public trial by the terrorists. This added to the frustration felt by the British troops in Aden.
The terrorists also started fighting each other. Armed members of FLOSY and the NLF took to the streets of Crater and started shooting each other while the Arab Police stood by and did nothing. Arson, looting and killing went unchecked, fuelled by Cairo Radio. Royal Marines and Fusiliers blocked off the two main entrances to Crater. As they were doing this they came under fire from Arab terrorists in the old Turkish fort on Sira Island. A well placed round from an armoured car of the Queens Dragoon Guards landed among the terrorists, putting an end to their sniping.
On hearing the news of the police ambush, Lt. Col. Mitchell of the 1st Battalion Argyll and Sutherland Highlanders together with Col. Blenkinsop of the Northumberland Fusiliers went to Brigade HQ to get permission to take both their Battalions into Crater and retrieve the bodies of their men. General Tower refused to allow any more British troops to enter Crater. The British higher authorities had refused to immediately put an end to this because of the fear of the whole country rising up and endangering the many British civilians up country. Negotiations were held with the South Arabian Army to try and clam things down before the British could re-take Crater.
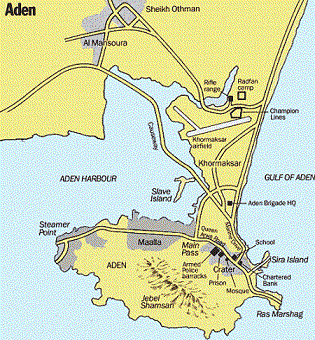
After three days, General Tower decided that the Arab Police had cooled down and started making plans for the re-entry of British security forces into Crater. The Argyll & Sutherland Highlanders were assigned the task. Mitchell went to Brigade HQ and presented his plan. Mitchell's plan was simple. The plan was for the Argyll & Sutherland Highlanders to retake Crater from the seaward and Eastern end in three phases, with the final phase being the clearing of the Arab Police barracks. It involved surrounding the North and West sides of Crater from hill top positions while a helicopter force landed on the Ras Marshag peninsular. This force would move into Crater from the south while the rest of the Battalion would enter Crater through the Marine Drive entrance. The attack would be made at night when most of the terrorists would be asleep.
General Tower approved the plan and Mitchell was allowed to start sending reconnaissance patrols into Crater at night to obtain an accurate picture of terrorist locations and movements. From the 25th of June onwards the Argylls sent in small patrols at night into the outskirts of Crater. None of the patrols met any opposition. Proving that most of the terrorists went to bed at night, Mitchell was ready to take the Argylls in but was told to "Cool his Heals " while negotiations continued with various Arab parties.
On the 2nd of July, Mitchell, who was frustrated with waiting around for the go word, decided to make a daylight reconnaissance himself. Mitchell explains what happened:
'With David Thomson (Battalion Adjutant) manning the machine gun on my Land Rover and followed by my escort with a second machine-gun, I drove through the Marine Drive road block and up to the Supreme Court position where our forward section of Jocks were manning a post sandbagged in behind the judge's throne.
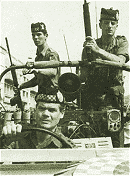
The Supreme Court road was always under enemy observation and often under fire so it was normal to cover this stretch of road in a fast armoured personnel carrier. As we drew level with the turn I accelerated rather than turning around and headed into Crater. David Thomson, to whom I said nothing, cocked his weapon and got into a crouched position. My own personal bodyguard, Lance Corporal Hughie Mitchell from Campbeltown in Argyll, was standing upright above my head equally ready for anything. Beside him, Corporals Grant and Logie, my singulars, kept Battalion HQ informed of my movements. We roared straight into hostile territory, past the ice factory to our right and schools to our left towards the burnt out shell of the Legislative Council building, which had been destroyed by the Arab mobs. If there were terrorists about they were too startled to fire at us. But then something alarming did happen. Somebody shouted a warning. I looked round and saw that a low trolley about eight feet long and loaded with Coca Cola bottles was being pulled into the road behind us, cutting off our escape. Once trapped in the road we would be shot to pieces.
Instant action was essential. I swung the Land Rover round in a tight U-turn and headed at full speed towards the trailer. We struck it side on and smashed through, showering Coca Cola bottles in all directions. The second Land Rover followed, bursting both rear tires on the broken class. A few moments later we were back at our own positions, elated, relieved but disappointed at having been unable to penetrate more deeply into Crater.'
One month after Mitchell's foray in Crater the British authorities were presented with an official claim for the loss of 800 Coca Cola bottles.
On the 3rd Mitchell was given the go ahead to launch "Operation Stirling Castle", the code name for the retaking of Crater. The operation would be carried out by the Argylls with the support of Saladin armoured cars of A Squadron Queens Dragoon Guards under the command of Major Tony Shewan. A troop of 60th Squadron Royal Engineers; a helicopter from 47th Light Regiment Royal Artillery; radio traffic was to handled by 15th Signal Regiment Royal Corps of Signals and additional transport came from 60th Squadron Royal Corps of Transport.
At 5 o'clock on the night of the 3rd the Battalion formed up ready to advance into Crater. Mitchell had invited some members of the press along to record the moment. The Argylls were ready to go in! The Queens Dragoon Guards had struck up an affinity with the Royal Northumberland Fusiliers, from whom the Argylls had taken over. The men who manned the armoured cars had taped the red and white hackles to their radio aerials to ensure that the Northumberlands were symbolically represented at the re-entry into Crater. Major Ian Mackay now commanded D company after the death of Bryan Malcolm, also killed on the 20th. Mackay carried with him Malcolm's cromach (shepherds crook) in honour of the fallen officer. B Company, commanded by Major Paddy Plamer, would lead the advance. Major Ian Robertson's A Company would push along the causeway and take Sira Island.
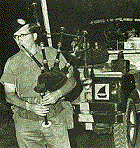
At H hour, a platoon of Argyll & Sutherland Highlanders landed near Strah Island close to the South Gate from a RN helicopter. The platoon took up positions guarding the South Gate. At 1800 hours the main part of the Battalion moved into the eastern built-up area of Crater and soon joined up with the patrol at the South Gate. Leading the Battalion was Pipe Major Kenneth Robson playing "Monymusk" the Regimental charge. Shortly after the Battalion moved off from the start line they came under machine gun fire from the edge of town. Every one dropped to the floor except for Pipe Major Robson, who continued to play. The Argylls returned fire and the machine gunning stopped but one lone sniper continued to take shots at the advance although he was firing too high and the shots flew safely over the heads of the Jocks. The lead Saladin gunner used 6 boxes of .30 MG to suppress rebels who were firing from the school buildings across the bay from the Dragoons positions. The rest of B Company coming from Ras Marshag soon met the main advance. They had confronted a small group of Arabs near a cinema on the outskirts of Crater. The Arabs had been ordered to halt. One Arab had started to run and was shot by the Argylls. He was to be the only man killed that night.
By 11 o'clock, Phase One had been completed. The Argylls had established themselves in the Chartered Bank and the Legislative Council building. Major Ian Robertson's A Company advanced along the causeway and took Sira Island. A Company climbed the steep sides of the old Turkish fort only to find that the terrorists had fled, leaving their flag behind. This flag was quickly removed and replaced with an Argyll flag. Nigel Crowe, Mitchell's Arabic speaking officer, and his section of Argylls, had secured the Treasury building. Crowe had bravely confronted the Arab Police guarding the building alone and speaking in Arabic told them that the Jocks were not going to kill them; they only wanted to occupy the building. It was a tense moment but he gradually won their confidence and they opened the steel doors to the Treasury.

As dawn broke on the 4th of July the inhabitants of Crater awoke to the sound of the "Long Reveille" and "Hey Johnnie Cope ". Mitchell had ordered the Pipes and Drums to play from the rooftop of the Education Institution. Surrounded by riflemen the Pipes and Drums music informed the inhabitancy of Crater that the British were back. The Queens Dragoon Guards sent a message to the Northumberland Fusiliers saying " Your hackles fly again in Crater" With Phase One and Two now completed without any major confrontations, Mitchell radioed Brigade HQ for permission to commence Phase Three. Permission was granted. The Argylls were now allowed to advance and confront the Arab Armed Police in their barracks, the scene of the 20th of June ambush.
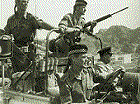
Early the next morning Mitchell held a meeting with Superintendent Ibrahim of the Arab Armed Police. The meeting took place at the Chartered Bank, which had become Battalion HQ. Ibrahim told Mitchell that his men were very afraid of what was going to become of them after what had happened on the 20th. Mitchell informed Ibrahim that the Argylls were not out for revenge and as long as the Superintendent ordered his men to lay down their weapons and hand over the mutineers to allow justice to take it's normal course, there would be no fighting. On the other hand, if the Arab Armed Police fired on the Jocks as they approached the Police barracks, Mitchell told Ibrahim that the Argylls would "wipe out" the police. This left no doubt in Ibrahim's mind as to who was in control now.
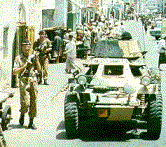
Phase Three started with the Brigade Major, Colonel Peter Downward of the 1st Battalion the Lancashire Regiment drove up the Queen Abour Road with his batman riding shotgun. Col. Downward then radioed Col. Mitch to tell him to advance his Battalion up the Queen Abour Road. The Argylls now made their final and well-publicized advance into the main part of Crater. Once again there was no firing. Negotiations were conducted with the Arab Police and the bodies of the dead British soldiers were removed. Over the last few days the bodies had been mutilated. Now the Argylls established themselves as the new armed force inside Crater. Although the Argylls did have a lot of support in retaking Crater, the press shone the limelight on the Argylls and especially "Mad Mitch". Now that the British were back in Crater they had to keep it under control. An uneasy truce had been reached with the Aden Police and relations were strained. The British troops could not understand why the Police were not being arrested for their mutiny and patrols on the streets of Aden were very alert in case the Police turned treacherous again.

